You will quickly learn that most, if not all, of the recipes I use, I found on Pinterest. If you have never used Pinterest, or even browsed around, I highly recommend it; it's definitely my favorite website.
This first recipe is called Mexican Chicken, and I already have improvised on the ingredients.
What you will need to to make this is:
4 boneless, skinless, chicken breasts;
1 (16 ounce) jar of salsa (Won't lie, I just had to google how many ounces of salsa were in that bottle). I also always buy two jars, because I like to eat chips and salsa as a side;
1 (16 ounce) package Monterrey Jack Cheese. As you can see, I used "Mexican Style" cheese, this was only because I already had it in my fridge;
Rice - I made 1 1/2 cups. Rice doubles remember, so this will make 3 cups total;
Tortilla Chips
And, off we go.
Before we start any preparation of the food, REMEMBER to pre-heat your oven.
350 degrees F, please.
First things first, wash your chicken. And trim off anything that looks like you wouldn't want to eat it. Of course, what you want to eat is up to you.
Next, in a 9x13 pan, you are going to lay the four chicken breasts next to each other, flat.
These chicken breasts looked much smaller in the packaging, just sayin'.
Then, you will want to cover each of the chicken breasts in salsa.
See, like this.
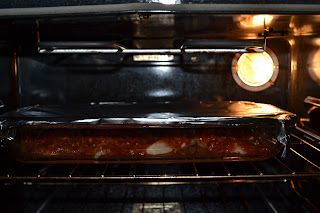
Then, cover your pan with tin foil and place in the oven.
The chicken will cook for 25 minutes covered.
I'm not too fond of this oven picture, but I searched all over online, and couldn't find anyone who could tell me how to improve it. Bummed.
While the chicken is cooking, I started my rice. I just use my rice cooker.
If you don't have one, just follow the instructions on the box, they're pretty simple.
After the first 25 minutes in the oven, remove the tin foil and let the chicken cook for another 25 minutes uncovered.
After the second round of 25 minutes, remove the chicken from the oven, and sprinkle cheese (to your desire) over the top of each piece of chicken.
Then return the chicken to the oven for 5-10 minutes or until the cheese is completely melted on top.
After the cheese is melted, serve the chicken over rice with tortilla chips on the side!
Ta-da. That easy.
I found this helpful tip from this cute website. I know, I'm not shooting holiday food, but I figured that this applied to this food also, and this is what I was headed for with the last shot.
"A fork’s-eye view. Lower and raise the camera to obtain unique perspectives. Place your camera on the table and photograph your plate from the point of view of your utensils. Photographing your meal from a low angle can bring volume and scale to your food, while allowing you access to a picture you would not be able to capture with your own eyes—unless you really crouched and strained at the table!"
My thought after making this, was maybe I could marinate the chicken in salsa to kind of preserve some of the juices? Guess what I found out? First of all, Pace has it's own website. Didn't even know that. Secondly, they have recipes that all use pace. Guess what's on there? Marinated chicken. I may have to include this marinating step next time I cook this meal, and I'll have to take into account Pace's tip; "TIP Ingredient Note: We develop our recipes using a 4-to 5-ounce skinless, boneless chicken breast half per serving. However, there are a range of sizes available in-store, from the butcher counter to the meat case and the freezer section. Use whichever you prefer- just follow the recipe as written above for the best result. If you're using larger chicken breasts they may require a little longer cooking time."
Learn something new every day!


No comments:
Post a Comment