Monday, December 12, 2011

Pasta Fresca

So, I LOVE Noodles & Company's Pasta Fresca. If you haven't tried it I suggest you do, I even found this blog where it is one of their favorite recipes. :)
But, I've been trying to be good, and not eat out. Because of this I went on a journey to find the recipe to make it myself. Lo and behold, food.com came to my rescue.

I started looking over the ingredients, thinking that it should be pretty easy; Olive Oil, Onion, Salt, Roma Tomato, Farfalle Pasta. Then I came across on ingredient that I don't have in my house. Sweet White Wine. For someone who has never stepped foot in a liquor store, I have some questions. First off, this recipe, for FOUR servings calls for only 1/4 cup of sweet white wine; so, that means if I'm making it for just myself, or even for the two of us that means, I would only need...

Pull out my handy conversion chart...
1 tablespoon (tbsp) =
3 teaspoons (tsp)
1/16 cup =
1 tablespoon
1/8 cup =
2 tablespoons
1/6 cup =
2 tablespoons + 2 teaspoons
1/4 cup =
4 tablespoons
1/3 cup =
5 tablespoons + 1 teaspoon
3/8 cup =
6 tablespoons
1/2 cup =
8 tablespoons
2/3 cup =
10 tablespoons + 2 teaspoons
3/4 cup =
12 tablespoons
1 cup =
48 teaspoons
1 cup =
16 tablespoons
8 fluid ounces (fl oz) =
1 cup
1 pint (pt) =
2 cups
1 quart (qt) =
2 pints
4 cups =
1 quart
1 gallon (gal) =
4 quarts
16 ounces (oz) =
1 pound (lb)
1 milliliter (ml) =
1 cubic centimeter (cc)
1 inch (in) =
2.54 centimeters (cm)


Source: United States Dept. of Agriculture (USDA).
At the most,  1/8 of a cup of white wine.
White wine really isn't something you ask your neighbor for, so my first dilemma is the fact that I have to go buy an entire bottle. Next dilemma, what am I going to do with the rest of the bottle? Does it go to waste? Will it taste any different if I don’t use the wine? Not sure.
This whole thing was proving to be too much work. I just really wanted Pasta Fresca, and maybe one of these days I will actually attempt to cook it. I’ll just have to start searching for recipes that call for white wine so I can make sure that I make good use of the bottle I am going to have to purchase. My suggestion, make smaller bottles, for people like me who can’t justify buying a whole bottle of wine for 1/8 of a cup.
Needless to say, I ended up sending my husband to pick up some Noodles.
And it was delicious.


Friday, December 9, 2011

Lemon Garlic Spaghetti


This is another recipe I found on Pinterest. The first time I cooked it, I used way too much lemon, and it was really strong, so good lesson, stick to the recipe.
Here's what you will need:
4 ounces of dry spaghetti;
1/4 cup grated Parmesan;
2 tsp. olive oil;
1 clove of garlic;
1/2 lemon;
2 T pine nuts (I don't use pine nuts, we had a bad food poisoning experience once);
5-6 basil leaves;
Black pepper 
First thing, prepare your garlic. Remove it from the skin, and cut it however you see fitting. I mince, you may want to only chop. Up to you.
Next, add your olive oil into your pan.
I highly suggest you add the oil first. From personal experience.
Then you can add your garlic. 

I totally messed up here when I cooked it. Silly me had the burner on, boiling the water for my spaghetti, but didn't realize what burner I had on, and where I was placing things. So, I burned my garlic.
No joke, it was almost instantly that the garlic went black. I didn't want that to happen again, so I went look for some tips, and found this website that gives tips on how not to burn your garlic. What's the first tip? Oh weird. 
"Don't heat the oil too high. Olive oil is best for sauteing garlic. Heat the oil to a medium setting. If your oil begins too smoke, it is too hot. An oil heated on a lower setting for a short saute period will help you get perfectly sauteed garlic." Article Source: http://EzineArticles.com/2974112
I found this tip really interesting, it was something I would have never thought about; "Use a copper pan. Copper pans are great for sauteing. They typically have a thicker bottom than most pans, which prevents the cooking surface from overheating." 
Then there is this genius tip, "Don't leave your garlic unattended. There is a very short period of time between garlic that is perfectly done and garlic that is burned and bitter. Keep an eye on your garlic while it is cooking, stirring occasionally to ensure that it is evenly sauteed. As soon as it develops a light golden brown color, remove it from the heat and transfer to another surface. Just removing the garlic from the heat may not save it from burning, as the pan will still be hot and continue to cook the garlic."
Anyway, moving on.
While you are watching your garlic, you can start cooking your noodles.
As previously stated, I don't cook. I haven't ever cooked. When I got married, and still, I can only do noodles. My husband introduced me to adding oil into the boiling pot of water before adding the noodles. Apparently this is to make it so the noodles don't stick together. I was curious if it really did anything, so I went snooping. According to Laura Schenone, author of the The Lost Ravioli Recipes of Hoboken, adding oil to your noodles does not prevent them from sticking together. 
In fact, this is what she has to say about it, “Oil in pasta water just floats on top, and when you drain the pasta, most of it will go down the drain,” she explains. “But you’ll also get some of it on your pasta.” This coating of oil makes it harder for the pasta to absorb any sauce added later. The only instance when oil might be useful is with filled pasta; it makes the filled bits less likely to open as they collide in the boiling water. Otherwise, you’re just wasting good oil."
Well then, it's settled. No more oil in the pasta water.
Thank you Laura.


When the noodles are done, strain them. Don't do anything with them yet, but don't let them sit too long because then they stick to each other and don't absorb the other ingredients very well. 
When your garlic is done (you want it to be lightly browned around the edges) add the oil and the garlic chunks into a bowl with the cheese, and the pine nuts if you have chosen to use them. 
Mix all of those things together.
Now you're going to need that half of the lemon. 
Squeeze the lemon juice into your bowl with the cheese, oil, garlic, pine nuts mixture. 
Then add your spaghetti and toss everything together. 
After everything is tossed, you can add the basil and the black pepper to your desire.  
And, you're done!
I add a little cheese and a squeeze of lemon juice after it's plated, but do what you'd like!
If you're looking for meat to go with this, I suggest chicken. I think it would work fantastically. 
I must give a shout out to my husband; thank you for being my hand model.
;)


Tuesday, December 6, 2011

Mexican Chicken

You will quickly learn that most, if not all, of the recipes I use, I found on Pinterest. If you have never used Pinterest, or even browsed around, I highly recommend it; it's definitely my favorite website.
This first recipe is called Mexican Chicken, and I already have improvised on the ingredients.
What you will need to to make this is:
4 boneless, skinless, chicken breasts;
1 (16 ounce) jar of salsa (Won't lie, I just had to google how many ounces of salsa were in that bottle). I also always buy two jars, because I like to eat chips and salsa as a side;
1 (16 ounce) package Monterrey Jack Cheese. As you can see, I used "Mexican Style" cheese, this was only because I already had it in my fridge;
Rice - I made 1 1/2 cups. Rice doubles remember, so this will make 3 cups total;
Tortilla Chips

 And, off we go.
Before we start any preparation of the food, REMEMBER to pre-heat your oven.
350 degrees F, please.
First things first, wash your chicken. And trim off anything that looks like you wouldn't want to eat it. Of course, what you want to eat is up to you. 
Next, in a 9x13 pan, you are going to lay the four chicken breasts next to each other, flat.
These chicken breasts looked much smaller in the packaging, just sayin'.  
Then, you will want to cover each of the chicken breasts in salsa. 
See, like this. 
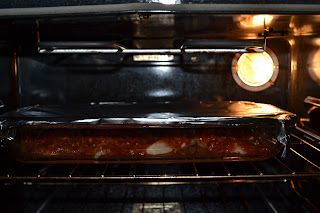
Then, cover your pan with tin foil and place in the oven. 
The chicken will cook for 25 minutes covered. 
I'm not too fond of this oven picture, but I searched all over online, and couldn't find anyone who could tell me how to improve it. Bummed.
While the chicken is cooking, I started my rice. I just use my rice cooker. 
If you don't have one, just follow the instructions on the box, they're pretty simple. 
After the first 25 minutes in the oven, remove the tin foil and let the chicken cook for another 25 minutes uncovered.  
After the second round of 25 minutes, remove the chicken from the oven, and sprinkle cheese (to your desire) over the top of each piece of chicken.
Then return the chicken to the oven for 5-10 minutes or until the cheese is completely melted on top. 
After the cheese is melted, serve the chicken over rice with tortilla chips on the side!
Ta-da. That easy.

I found this helpful tip from this cute website. I know, I'm not shooting holiday food, but I figured that this applied to this food also, and this is what I was headed for with the last shot.
"A fork’s-eye view. Lower and raise the camera to obtain unique perspectives.  Place your camera on the table and photograph your plate from the point of view of your utensils.  Photographing your meal from a low angle can bring volume and scale to your food, while allowing you access to a picture you would not be able to capture with your own eyes—unless you really crouched and strained at the table!"
My thought after making this, was maybe I could marinate the chicken in salsa to kind of preserve some of the juices? Guess what I found out? First of all, Pace has it's own website. Didn't even know that. Secondly, they have recipes that all use pace. Guess what's on there? Marinated chicken. I may have to include this marinating step next time I cook this meal, and I'll have to take into account Pace's tip; "TIP Ingredient Note: We develop our recipes using a 4-to 5-ounce skinless, boneless chicken breast half per serving. However, there are a range of sizes available in-store, from the butcher counter to the meat case and the freezer section. Use whichever you prefer- just follow the recipe as written above for the best result. If you're using larger chicken breasts they may require a little longer cooking time."
Learn something new every day!